
- Как измерить среднеквадратичное значение напряжения
- Plugins for Audio and Loudness Metering
- BUTE Loudness Analyzer 2
- Primary Features
- IZotope Insight 2
- LEVELS
- Плагины для измерения звука и громкости
- Анализатор громкости BUTE 2
- Основные характеристики
- УРОВНИ
- Как управлять пиковой смесью
- ЧАСТО ЗАДАВАЕМЫЕ ВОПРОСЫ
- На каком уровне должен быть мой мастер?
- Как увеличить RMS в мастеринге?
- Каким должен быть дБ мой микс перед мастерингом?
- Как увеличить RMS без пика?
- Как вы рассчитываете среднеквадратичное значение?
- Как преобразовать RMS в ватты?
- Почему используется среднеквадратичное значение вместо среднего?
- Больше ли ватт RMS лучше?
- Является ли 18 ватт RMS хорошим показателем?
- The Differences of RMS and Peak Values
- Average electrical power
- What RMS Level Should I Master To?
- Perception of Audio
- Среднее значение напряжения
- Как соотносятся RMS и ограничители
- How RMS and Limiters Correlate
- Действующее значение напряжения и тока
- FAQ
- What level should my master be at?
- How do you increase RMS in mastering?
- What dB should my mix be before mastering?
- How do you increase RMS without peaking?
- How do you calculate RMS?
- How do you convert RMS to watts?
- Why is RMS used instead of average?
- Are more RMS watts better?
- Is 18 watts RMS good?
- How to Manage a Peaking Mix
- Total system power
- До какого уровня RMS следует довести мастерство?
Как измерить среднеквадратичное значение напряжения
Так вот, T-RMS расшифровывается как True RMS — «правильное среднеквадратическое значение». Мои токоизмерительные клещи могут замерять этот параметр без труда, так как на них есть логотип «T-RMS».

мультиметр с True RMS
Проведем небольшой опыт. Давайте соберем вот такую схемку:

Выставим на моем китайском генераторе частоты треугольный сигнал с частотой, ну скажем, 100 Герц

А вот осциллограмма этого сигнала. Внизу, в красной рамке, можно посмотреть его параметры

И теперь вопрос: чему будет равно среднеквадратическое напряжение этого сигнала?
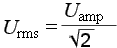
Так как один квадратик у нас равняется 1 Вольт (мы это видим внизу осциллограммы в красной рамке), то получается, что амплитуда Umax этого треугольного сигнала равняется 4 Вольта. Для того, чтобы рассчитать среднеквадратическое напряжение, мы воспользуемся формулой:

Итак, смотрим нашу табличку и находим интересующий нас сигнал:
.png?is-pending-load=1)
Для нас не важно, пробивает ли сигнал «пол» или нет, главное, чтобы сохранялась форма сигнала. Видим, что наш коэффициент амплитуды Ka= 1,73.
Подставляем его в формулу и вычисляем среднеквадратическое значение нашего треугольного сигнала


Проверяем нашим прибором, так ли оно на самом деле?

Супер! И в правду Тrue RMS.
Замеряем это же самое напряжение с помощью моего китайского мультиметра

Он меня обманул :-(. Он умеет измерять только среднеквадратическое значение синусоидального сигнала, а у нас сигнал треугольный.
Самый интересный сигнал в плане расчетов — это двуполярный меандр, ну тот есть тот, который «пробивает пол».

Его амплитудное Umax, средневыпрямленное Uср.выпр. и среднеквадратичное напряжение U равняется одному и тому же значению. В данном случае это 1 Вольт.
Вот вам небольшая картинка, чтобы не путаться

среднее, среднеквадратичное и пиковое значения напряжения
- Сред. — средневыпрямленное значение сигнала. Это и есть площадь под кривой
- СКЗ — среднеквадратичное напряжение. Как мы видим, для синусоидальных сигналов, оно будет больше, чем средневыпрямленное.
- Пик. — амплитудное значение сигнала
- Пик-пик. — размах или двойная амплитаду. Или иначе, амплитуда от пика до пика.
Так что же все-таки показывает мультиметр при измерении переменного напряжения? Показывает он НЕ амплитудное, НЕ среднее и НЕ среднее выпрямленное напряжение, а среднее квадратическое, то есть действующее напряжение! Об этом всегда помним.
Plugins for Audio and Loudness Metering
Along with tons of do’s and don’ts we’ve covered in this article, there are many plugins to choose from that’ll assist with metering the loudness of your whole track. Utilizing level meters in combination with technical knowledge will help refine your tracks and improve their quality. Below you’ll find three different plugins that will meter various aspects of the loudness of your track.
BUTE Loudness Analyzer 2
This loudness meter from BUTE allows you to accurately read the whole track’s integrated LUFS and loudness range. It also logs the timeline of your song so you can revisit a particular part of your song and reread the loudness. You can set the plugin to read True Peak or LUFS, and it also provides a compact mode to save CPU space.
Primary Features
- Manually switch between LUFS, True Peak, and RMS readings.
- Multiple presets for particular audio production needs can be manually adjusted and provide a solid base for adjusting parameters.
- Playback log that allows you to revisit particular parts of the audio and get a new reading of its loudness.
IZotope Insight 2
When in need of thorough audio analysis, the Insight 2 plugin from iZoptope covers it all. It provides multiple modules that allow you to display meters for the loudness level of your track. This plugin measures stereo width, loudness, frequencies, and an emulator for specific listening environments that can help you adjust the audio to your target audience.
- Multiple audio metering tools from loudness range, peak, true peak, short and long-term integrated LUFS, and RMS metering.
- Many base presets for the loudness meter.
- 2D and 3D viewing options for the spectrogram module.
- Expandable and adjustable modules to further customize screen space and prioritize metering tools.
LEVELS
The LEVELS plugin by Mastering the Mix is known in the audio engineering community for its ease of use and simplicity. Providing six different audio metering tools and comes with plenty of presets to aid beginners. If you’re looking to make your track sound louder, this plugin will assist you in refining your tracks’ loudness, peak levels, dynamic range, and more. You can find some of this plugin’s key features below.
- Useful presets for beginner and experienced audio engineers alike.
- In-depth audio metering with six different level meters such as peak, stereo field, LUFS, LRA (loudness range), dynamic range, and bass space (low-end analyzer).
Плагины для измерения звука и громкости
Наряду с множеством “до” и “не”, о которых мы рассказали в этой статье, существует множество плагинов, которые помогут измерить громкость всего вашего трека. Использование измерителей уровня в сочетании с техническими знаниями поможет усовершенствовать ваши треки и улучшить их качество. Ниже вы найдете три различных плагина, которые измерят различные аспекты громкости вашего трека.
Анализатор громкости BUTE 2
Этот измеритель громкости от BUTE позволяет точно считывать интегрированный LUFS и диапазон громкости всего трека. Он также регистрирует временную шкалу вашей песни, чтобы вы могли вернуться к определенной части композиции и повторно прочесть уровень громкости. Вы можете настроить плагин на считывание True Peak или LUFS, а также использовать компактный режим для экономии места на процессоре.
Основные характеристики
- Ручное переключение между показаниями LUFS, True Peak и RMS.
- Несколько предустановок для конкретных потребностей аудиопроизводства могут быть настроены вручную и обеспечивают прочную основу для настройки параметров.
- Гибкий пользовательский интерфейс, который легко читается, и компактный режим для экономии места на экране и процессоре.
- Журнал воспроизведения, позволяющий повторно просмотреть определенные части аудиозаписи и получить новое представление о ее громкости.
Когда требуется тщательный анализ звука, плагин Insight 2 от iZoptope охватывает все. Он предоставляет несколько модулей, позволяющих отображать измерители уровня громкости вашего трека. Этот плагин измеряет ширину стерео, громкость, частоты, а также эмулятор для конкретных условий прослушивания, который поможет вам настроить звук под вашу целевую аудиторию.
- Настраиваемый пользовательский интерфейс, позволяющий одновременно просматривать несколько измерителей уровня.
- Множество инструментов измерения аудиосигнала: диапазон громкости, пик, истинный пик, краткосрочный и долгосрочный интегрированный LUFS, а также измерение RMS.
- Множество базовых предустановок для измерителя громкости.
- Опции 2D и 3D просмотра для модуля спектрограммы.
- Расширяемые и регулируемые модули для дополнительной настройки пространства экрана и определения приоритетов инструментов измерения.
УРОВНИ
Плагин LEVELS от Mastering the Mix известен в сообществе аудиоинженеров своей простотой и легкостью в использовании. Он предоставляет шесть различных инструментов измерения звука и поставляется с большим количеством пресетов для новичков. Если вы хотите, чтобы ваш трек звучал громче, этот плагин поможет вам улучшить громкость вашего трека, пиковые уровни, динамический диапазон и многое другое. Ниже вы можете ознакомиться с некоторыми ключевыми особенностями этого плагина.
- Простой пользовательский интерфейс с самоочевидными параметрами.
- Полезные пресеты как для начинающих, так и для опытных аудиоинженеров.
- Углубленная аудиометрия с шестью различными измерителями уровня, такими как пик, стереополе, LUFS, LRA (диапазон громкости), динамический диапазон и bass space (анализатор низких частот).
A graph of instantaneous power over time for a waveform, with peak power labeled P0 and average power labeled Pavg
For a purely resistive load, a simpler equation can be used, based on the root mean square (RMS) values of the voltage and current waveforms:
In the case of a steady sinusoidal tone (not music) into a purely resistive load, this can be calculated from the peak amplitude of the voltage waveform (which is easier to measure with an oscilloscope) and the load’s resistance:
Though a speaker is not purely resistive, these equations are often used to approximate power measurements for such a system. Approximations may be used as reference on a specification sheet of a product.
An amplifier under test can drive a sinusoidal signal with a peak amplitude of 6 V (driven by a 12 V battery). When connected to an 8 ohm loudspeaker this would deliver:
In most actual car systems, the amplifiers are connected in a bridge-tied load configuration, and speaker impedances are no higher than 4 Ω. High-power car amplifiers use a DC-to-DC converter to generate a higher supply voltage.
Как управлять пиковой смесью
Частым разочарованием среди музыкантов является то, как легко вызвать пик в вашем миксе. Музыка, естественно, часто бывает громкой, и хотя вы хотите передать эту мощь, ею все равно нужно управлять, чтобы она стала приятной для прослушивания. Устранение пиков также требует многоуровневого подхода с помощью плагинов, таких как измеритель громкости или даже инструменты
уменьшения усиления
. Считывать пиковые значения довольно просто, и это может помочь вам определить источник, вызывающий пик. Кроме того, необходимо проверить среднюю громкость и интегральную громкость.
Хотя мы знаем, как работать и читать частотный спектр, мы не можем услышать его весь, поэтому визуальное представление, которое дает измеритель громкости, очень важно для дальнейшего освоения аудиопродукции. Музыка обычно содержит множество различных элементов, каждый из которых занимает свое собственное пространство. В большинстве случаев их громкость не будет находиться на одном уровне. Кроме того, чтение среднеквадратичных и интегральных значений громкости поможет вам определить, где микс нуждается в доработке.
Звучание микса – это сочетание частот, и во многих случаях эти частоты сталкиваются друг с другом или борются за одно и то же пространство. Динамический диапазон каждого трека в производстве должен быть сформирован таким образом, чтобы соответствовать остальному звуку. Если этим пренебречь, это может быстро привести вас к пиковому миксу. Помимо использования таких методов, как снижение усиления, настройка эквалайзера каждой дорожки может стать надежным решением проблемы громкости. Помимо инструментов, доступных в современном мире музыкального производства, понимание ограничений человеческого уха также пойдет на пользу вашей технике микширования.
ЧАСТО ЗАДАВАЕМЫЕ ВОПРОСЫ
Это средний уровень громкости на выходе в течение короткого времени
На каком уровне должен быть мой мастер?
Что касается RMS, то для более громких треков рекомендуется использовать диапазон от -7dBFS до -12dBFS, а для более тихих – от -16dBFS до -18 dBFS.
Как увеличить RMS в мастеринге?
Короче говоря, вы можете увеличить RMS в своем треке, уменьшив динамический диапазон. Изменение этого параметра позволит вам отрегулировать более громкие и более тихие части композиции, что приведет к увеличению RMS.
Каким должен быть дБ мой микс перед мастерингом?
Рекомендуется, чтобы ваши пики располагались между -18 дБ и -3 дБ в вашем миксе, чтобы обеспечить достаточное пространство для процесса мастеринга.
Как увеличить RMS без пика?
Существует несколько способов достижения этого результата, но один из основных – использование лимитера в мастер-цепи. Вы можете настроить параметры этого плагина для ограничения любого пика.
Как вы рассчитываете среднеквадратичное значение?
RMS рассчитывается с помощью среднего значения уровней громкости за период около 300 миллисекунд с использованием измерителя уровня.
Как преобразовать RMS в ватты?
Поскольку коэффициент преобразования 1 ватт равен 0,707 RMS, все, что вам нужно сделать, это разделить значение RMS на 0,707.
Почему используется среднеквадратичное значение вместо среднего?
RMS используется как сокращение от среднеквадратичного значения, именно так рассчитывается средняя громкость.
Больше ли ватт RMS лучше?
Хотя большее количество ватт RMS может обеспечить большую мощность, оно также сопровождается большими искажениями. Поэтому количество подаваемой мощности должно зависеть от потребностей аудиосистемы или оборудования.
Является ли 18 ватт RMS хорошим показателем?
Дело не в том, хорошо это или плохо; дело в знании пороговых значений. Например, 20 ватт RMS – это максимальное количество чистой мощности, которую могут выдать усилители. В этом случае все, что превышает 20 ватт RMS, начнет искажать звук.
The Differences of RMS and Peak Values
RMS (root mean square) is an average of the loudness in the waveform as a whole. This also means that a brief, one-shot audio clip wouldn’t read as high as a sustained one. An RMS meter approximates how we perceive sound, which is important as our ears don’t pick up every frequency, and we need to visualize how the audio is performing. Furthermore, our ears won’t pick up certain peaks, which is why we need the help of other audio metering tools to get the most accurate value reading.
In regards to peak value, this determines the highest voltage a waveform will reach. If your audio is peaking, this is where you’ll start to hear clipping and distortion. Another difference between peak and RMS values is peak displays an instantaneous reading. In contrast, RMS provides a reading across a short time frame of roughly 300 milliseconds, as previously stated in this article. As a musician, nearly every creation will have a unique dynamic range, and it’s important to utilize both meters to determine a peak level, average loudness, and more.
Peak momentary power output and peak music power output are two different measurements with different specifications and should not be used interchangeably. Manufacturers who use different words such as pulse or performance may be reflecting their own non-standard system of measurement, with an unknown meaning. The Federal Trade Commission is putting an end to this with Federal Trade Commission (FTC) Rule 46 CFR 432 (1974), affecting Power Output Claims for Amplifiers Utilized in Home Entertainment Products.
This section needs expansion. You can help by adding to it.
where refers to the direct current (or average) component of the signal, and is the alternating current component of the signal.
Average electrical power
Electrical engineers often need to know the power, P, dissipated by an electrical resistance, R. It is easy to do the calculation when there is a constant current, I, through the resistance. For a load of R ohms, power is defined simply as:
However, if the current is a time-varying function, I(t), this formula must be extended to reflect the fact that the current (and thus the instantaneous power) is varying over time. If the function is periodic (such as household AC power), it is still meaningful to discuss the average power dissipated over time, which is calculated by taking the average power dissipation:
So, the RMS value, IRMS, of the function I(t) is the constant current that yields the same power dissipation as the time-averaged power dissipation of the current I(t).
Average power can also be found using the same method that in the case of a time-varying voltage, V(t), with RMS value VRMS,
This equation can be used for any periodic waveform, such as a sinusoidal or sawtooth waveform, allowing us to calculate the mean power delivered into a specified load.
By taking the square root of both these equations and multiplying them together, the power is found to be:
Both derivations depend on voltage and current being proportional (that is, the load, R, is purely resistive). Reactive loads (that is, loads capable of not just dissipating energy but also storing it) are discussed under the topic of AC power.
In the common case of alternating current when I(t) is a sinusoidal current, as is approximately true for mains power, the RMS value is easy to calculate from the continuous case equation above. If Ip is defined to be the peak current, then:
where t is time and ω is the angular frequency (ω = 2/T, where T is the period of the wave).
Since Ip is a positive constant:
Using a trigonometric identity to eliminate squaring of trig function:
but since the interval is a whole number of complete cycles (per definition of RMS), the sine terms will cancel out, leaving:
A similar analysis leads to the analogous equation for sinusoidal voltage:
where IP represents the peak current and VP represents the peak voltage.
Because of their usefulness in carrying out power calculations, listed voltages for power outlets (for example, 120 V in the US, or 230 V in Europe) are almost always quoted in RMS values, and not peak values. Peak values can be calculated from RMS values from the above formula, which implies VP = VRMS × , assuming the source is a pure sine wave. Thus the peak value of the mains voltage in the USA is about 120 × , or about 170 volts. The peak-to-peak voltage, being double this, is about 340 volts. A similar calculation indicates that the peak mains voltage in Europe is about 325 volts, and the peak-to-peak mains voltage, about 650 volts.
RMS quantities such as electric current are usually calculated over one cycle. However, for some purposes the RMS current over a longer period is required when calculating transmission power losses. The same principle applies, and (for example) a current of 10 amps used for 12 hours each 24-hour day represents an average current of 5 amps, but an RMS current of 7.07 amps, in the long term.
The term RMS power is sometimes erroneously used in the audio industry as a synonym for mean power or average power (it is proportional to the square of the RMS voltage or RMS current in a resistive load). For a discussion of audio power measurements and their shortcomings, see Audio power.
where R represents the gas constant, 8.314 J/(mol·K), T is the temperature of the gas in kelvins, and M is the molar mass of the gas in kilograms per mole. In physics, speed is defined as the scalar magnitude of velocity. For a stationary gas, the average speed of its molecules can be in the order of thousands of km/hr, even though the average velocity of its molecules is zero.
When two data sets — one set from theoretical prediction and the other from actual measurement of some physical variable, for instance — are compared, the RMS of the pairwise differences of the two data sets can serve as a measure how far on average the error is from 0. The mean of the absolute values of the pairwise differences could be a useful measure of the variability of the differences. However, the RMS of the differences is usually the preferred measure, probably due to mathematical convention and compatibility with other formulae.
What RMS Level Should I Master To?
One of the trickiest parts about music is how subjective its creation and final product can be. Even though this is true, there are still many metrics with mastering audio that should land within certain parameters. With a loud track that has the purpose of carrying a bold and intense sound, they should have an RMS level of roughly -7dBFS to -12dBFS. Tracks that don’t have that much dynamic energy or quieter parts, would be better suited with an RMS level of -16dBFS to -18 dBFS.

Peak levels in audio can be tough to manage, and it can become even more challenging with the more tracks you have competing for the same audio space. Also, using level meters is a great way to get a better understanding of where your audio is peaking in the frequency spectrum. The dynamic range of your production has a direct correlation to your peak volume, and how these are managed in your track requires a unique approach to the particular needs of the production.
Any track that’s causing the mix to have too much distortion should be managed accordingly with the rest of the mix. The proper RMS value you’re looking for also varies depending on the style of song and genre and will require its own approach to the mix to achieve the wanted RMS level. Some songs require a louder or quieter approach, but it’s vital to make sure your levels aren’t peaking, and each track is mixed accordingly.
Чаще всего используют средневыпрямленное значение напряжения Uср. выпр. То есть площадь сигнала, которая «пробивает пол» берут не с отрицательным знаком, а с положительным.

средневыпрямленное значение напряжения будет уже равняться не нулю, а S1+S2=2S1=2S2. Здесь мы суммируем площади, независимо от того, с каким они знаком.
На практике средневыпрямленное значение напряжения получить легко, использовав диодный мост. После выпрямления синусоидального сигнала, график будет выглядеть вот так:

выпрямленное переменное напряжение после диодного моста
Для того, чтобы примерно узнать, чему равняется средневыпрямленное напряжение, достаточно узнать максимальную амплитуду синусоидального сигнала Umax и сосчитать ее по формуле:

Perception of Audio
On the frequency spectrum, humans can hear between 20 Hz up to 20 kHz. In addition, hearing loss due to age or other factors can limit our frequency range. Considering each persons hearing abilities could be somewhat different, it’s essential to keep this in mind for an optimal mix. Once again, this factor with audio perception is another reason why
understanding dynamic range
, peak levels, integrated LUFS, and other loudness units are paramount.
How our ears perceive audio is also a solid guide for how you should
modify your EQ settings
. This should be a good balance of technical skill and knowledge of psychoacoustics. Of course, technical skills can go a long way with music production, but having a grasp of psychoacoustics can take your track to the next level. In addition, with more tracks stacked on top of each other, more frequencies will start to become masked as they’re fighting for the same space.

To attain a desirable mix requires the proper balance across the frequency spectrum. Although there are particular frequency parameters we can work within, this can be a subjective area to work on. Our ears can be misleading depending on the frequency range we’re receiving. As we get older, the masking of frequencies can become more common with our hearing. This is another reason why a visual representation of integrated loudness, peak level, average volume, and more is so important.
Среднее значение напряжения
Среднее значение переменного напряжения Uср — это, грубо говоря, площадь под осциллограммой относительно нуля за какой-то промежуток времени. Чтобы это понять, давайте рассмотрим вот такую осциллограмму.
среднее значение напряжения за период
Например,чему равняется среднее значение напряжения за эти два полупериода? В данном случае ноль вольт. Почему так? Площади S1 и S2 равны. Но все дело в том, что площадь S2 берется со знаком «минус». А так как площади равны, то в сумме они дают ноль: S1+(-S2)=S1-S2=0. Для бесконечного по времени синусоидального сигнала среднее значение напряжения также равняется нулю.
То же самое касается и других сигналов, например, двухполярного меандра. Меандр — это прямоугольный сигнал, у которого длительности паузы и импульса равны. В этом случае его среднее напряжение также будет равняться нулю.
Чаще всего используют среднеквадратичное значение напряжения или его еще по-другому называют действующим. В литературе обозначается просто буквой U. Чтобы его вычислить, тут уже простым графиком не отделаешься. Среднеквадратичное значение — это значение постоянного напряжения, который, проходя через нагрузку (скажем, лампу накаливания), выделяет за тот же промежуток времени такое же количество мощности, какое выделит в этой нагрузке переменное напряжение. В английском языке среднеквадратичное напряжение обозначается так: RMS (rms) — root mean square.
Связь между амплитудным и среднеквадратическим значением устанавливается через коэффициент амплитуды Ka:
Вот некоторые значения коэффициента амплитуды Ka для некоторых сигналов переменного напряжения:

Более точные значения 1,41 и 1,73 — это √2 и √3 соответственно.
Как соотносятся RMS и ограничители
При
работе над цепочкой мастеринга
вы наверняка применяли лимитер. Хотя этот инструмент может помочь увеличить воспринимаемую громкость звука, он более точен. Скорее всего, ваш звук достиг своего пикового уровня после добавления нескольких инструментов и плагинов. Совместное использование RMS и лимитера поможет вам определить, как следует устанавливать параметры для лимитера. Кроме того, это поможет вам определить, какие частоты вызывают пики.

Поскольку лимитеры могут мгновенно увеличить громкость вашего трека, важно убедиться, что они используются надлежащим образом и правильно воспринимаются в соотношении с динамическим диапазоном вашего трека. Лимитер удерживает пиковый уровень звука от клиппирования и искажения трека. Кроме того, увеличение параметров лимитера для достижения более громкого воспроизведения не означает, что качество вашего трека также увеличилось. Если параметры лимитера, например, атака, установлены слишком коротко или слишком долго, это может повредить динамический диапазон и переходные процессы трека.
Использование лимитеров на мастере
– обычная практика в мире музыкального производства, но их назначение и то, как они влияют на громкость вашего трека, часто понимают неправильно.
The RMS can be computed in the frequency domain, using Parseval’s theorem. For a sampled signal , where is the sampling period,
where and N is the sample size, that is, the number of observations in the sample and FFT coefficients.
In this case, the RMS computed in the time domain is the same as in the frequency domain:
How RMS and Limiters Correlate
When
working on your mastering chain
, there’s a good bet you’ve applied a limiter. Although this tool can help increase the perceived volume of the audio, it’s more precise than that. Chances are, your audio has reached its peak level after adding multiple instruments and plugins. Utilizing RMS and a limiter together will help you determine how you should set the parameters for the limiter. In addition, it will help you identify which frequencies are causing the peaks.
Since limiters can give your track an instant boost in loudness, it’s essential to make sure it’s being used appropriately and is being perceived correctly in correlation with the dynamic range of your track. A limiter will keep an audio’s peak level from clipping and distorting the track. Additionally, pushing a limiter’s parameters to achieve a louder playback doesn’t mean the quality of your track increased as well. If the limiters’ parameters, such as attack, were set too short or too long, it can harm the dynamic range and transients of the track.
Using limiters on your master
is a common practice in the world of music production, but their purpose and how they affect the loudness of your track are often misunderstood.
The RMS value of an alternating current is also known as its heating value, as it is a voltage which is equivalent to the direct current value that would be required to get the same heating effect. For example, if 120 V AC RMS is applied to a resistive heating element it would heat up by exactly the same amount as if 120 V DC were applied.
This principle was exploited in early thermal converters. The AC signal would be applied to a small heating element that was matched with a thermistor, which could be used in a DC measuring circuit.
The technique is not very precise but it will measure any waveform at any frequency (except for extremely low frequencies, where the thermistor’s thermal capacitance is too small so that its temperature is fluctuating too much). A big drawback is that it is low-impedance: that is, the power used to heat the thermistor comes from the circuit being measured. If the circuit being measured can support the heating current, then it is possible to make a post-measurement calculation to correct the effect, as the impedance of the heating element is known. If the signal is small then a pre-amplifier is necessary, and the measuring capabilities of the instrument will be limited by this pre-amplifier. In radio frequency (RF) work, the low impedance is not necessarily a drawback since 50 ohm driving and terminating impedances are widely used.
Thermal converters have become rare, but are still used by radio hams and hobbyists, who may remove the thermal element of an old unreliable instrument and incorporate it into a modern design of their own construction. Additionally, at very high frequencies (microwave), RF power meters still use thermal techniques to convert the RF energy to a voltage. Thermal-based power meters are the norm for millimeter wave (MMW) RF work.
Действующее значение напряжения и тока
В качестве примера можно рассмотреть квадратичную зависимость мощности или работы электрического тока от значений тока или напряжения.
P = I²R; A = I²Rt; P = U²/R; A = U²t/R
Величина постоянного напряжения или тока является его среднеквадратичным значением.
Среднеквадратичное значение переменного тока равно величине постоянного тока,
действие которого произведёт такую же работу в активной (резистивной) нагрузке за время периода.
Определяющим фактором здесь является среднее (среднеарифметическое) значение мощности Pavg
или работы Aavg,
пропорциональное квадрату значения тока.
Так же среднеквадратичное значение переменного напряжения за период равносильно
по своему воздействию на активную нагрузку такому же значению постоянного напряжения.
P = UI = Pavg = UrmsIrms
Среднеквадратичное значение переменного напряжения или тока часто называют действующим или эффективным.
Величину переменного напряжения или тока, в большинстве случаев,
выражают его среднеквадратичным значением и измеряют приборами электромагнитного типа или специальными среднеквадратичными измерителями – True RMS.
Примечание:
Электромагнитные приборы используют для измерения переменного тока и напряжения в промышленных установках.
Усилие, создаваемое измерительной катушкой в электромагнитном приборе, пропорционально квадрату тока, поэтому не меняется по направлению.
Угол отклонения стрелки определится некоторым средним усилием F, которое будет пропорционально среднеквадратичному значению тока.
FAQ
This is the average output level of loudness over a short time
What level should my master be at?
In terms of RMS, for louder tracks, it’s suggested to land between -7dBFS to -12dBFS and -16dBFS to -18 dBFS for quieter parts.
How do you increase RMS in mastering?
In short, you can increase the RMS in your track by decreasing the dynamic range. Modifying this parameter will allow you to adjust the louder and quieter parts of the song, leading to an increase in the RMS.
What dB should my mix be before mastering?
It’s recommended to have your peaks land between -18 dB and -3dB in your mix to provide enough headspace for the mastering process.
How do you increase RMS without peaking?
There are multiple ways to achieve this outcome, but one of the main methods is to use a limiter on the master chain. You can adjust the parameters of this plugin to limit any peaking.
How do you calculate RMS?
RMS is calculated with an average of loudness levels of a period of about 300 milliseconds using a level meter.
How do you convert RMS to watts?
With the conversion ratio of 1 watt equaling 0.707 RMS, all you have to do is divide the RMS value by 0.707.
Why is RMS used instead of average?
RMS is used as it’s short for root mean square, which is how the average loudness is calculated.
Are more RMS watts better?
Although having more RMS watts may deliver more power, it also comes with more distortion. So, the amount of power applied should be dependent on the needs of the audio or equipment.
Is 18 watts RMS good?
It’s not whether it’s good or bad; it’s about knowing your thresholds. For example, 20 watts RMS is the max amount of clean power that amplifiers can deliver. In this case, anything higher than 20 watts of RMS will start to distort the audio.
How to Manage a Peaking Mix
A common frustration amongst musicians is how easy it is to cause your mix to peak. Music can naturally be loud a lot of times, and although you want to capture that power, it still has to be managed to become a pleasurable listening experience. Fixing peaks also requires a multi-level approach with the help of plug-ins like a loudness meter, or even
gain reduction
tools. Reading your peak values is quite easy, and it can help you identify the source of what’s causing the peak. In conjunction, checking the average loudness and integrated loudness are also essential.
Although we know how to work and read the frequency spectrum, we can’t hear it all, so having a visual provided by a loudness meter is essential in further mastering an audio production. Music generally contains many different elements, all occupying their own space. Most of the time, their loudness won’t be at the same level. In addition, reading the RMS, and integrated loudness values will help you determine where the mix needs work.
The way a mix sounds is a combination of frequencies, and in many cases, these frequencies collide with each other or fight for the same space. The dynamic range of each track in production must be shaped to fit with the rest of the audio. If this is neglected, it can quickly lead you to a peaking mix. Aside from using methods like gain reduction, tweaking the EQ of each track can be a reliable fix for your loudness targets. On top of the tools available in today’s world of music production, it would also benefit your mixing techniques to understand the limitations of the human ear.
В качестве примера рассчитаем среднеквадратичное значение синусоидального напряжения.

Запишем выражение Urms с применением интеграла функции
U = Uampsin(t) для одного периода 2π :

Вынесем Uamp из под знака радикала.
Воспользуемся табличным интегралом


Так как sin(2π), sin(4π) и sin(0) равны нулю, вычисляем RMS синусоиды следующим образом:

В результате решения в итоге получим:
Расчёт RMS для напряжения или тока треугольной и пилообразной формы можно рассмотреть на примере одного периода T
для функции


Выразим Urms искомой функции с помощью определённого интеграла:

Используя табличный интеграл


В итоге преобразований получим:


Для вариантов однополярного или двуполярного напряжения пилообразной и треугольной формы в периоде 2T или 4T, представленных на рисунке ниже,
T и Uamp имеют те же расчётные величины,
что и в рассмотренном случае c функцией
,
а интегралы, определённые в интервалах, равных T, для квадратов используемых функций


,
будут иметь одно и то же значение


Следовательно, вышеуказанные варианты однополярного или двуполярного напряжения пилообразной и треугольной формы будут иметь
среднеквадратичное значение
В заключении рассмотрим пример вычисления действующего значения положительных прямоугольных импульсов длительностью Ti .

Выразим Urms одного периода T, как квадратный корень из среднеарифметического значения интегралов,
определённых в интервалах 0 – Ti и Ti – T для квадратов всех значений периода.

В результате получаем значение RMS, равное произведению амплитуды импульсов Uamp на квадратный корень из
коэффициента заполнения (Ti / T).

В качестве дополнительного материала предлагаем рассмотреть расчёт средеквадратичного значения напряжения накала кинескопа цветного телевизора, исходя из амплитуды и формы напряжения.
Замечания и предложения принимаются и приветствуются!
A voltage waveform and its corresponding power waveform (resistive load). RMS voltage in blue, peak power in green, average power in violet.
Continuous average sine wave power ratings are a staple of performance specifications for audio amplifiers and, sometimes, loudspeakers.
Continuous (as opposed to “momentary”) implies that the device can function at this power level for long periods of time; that heat can be removed at the same rate it is generated, without temperature building up to the point of damage.
Continuous power measurements do not actually describe the highly varied signals found in audio equipment (which could vary from high crest factor instrument recordings down to 0 dB crest factor square waves) but are widely regarded as a reasonable way of describing an amplifier’s maximum output capability. For audio equipment, this is nearly always the nominal frequency range of human hearing, 20 Hz to 20 kHz.
It always produces a higher value than the average power figure, however, and so has been tempting to use in advertising without context, making it look as though the amp has twice the power of competitors.
Total system power
To give a quick example, the purpose of a compressor is to manipulate the dynamic range of your track, and many people don’t know that compression is short for dynamic range compression. In many cases,
compressors are used to control an audio signal’s peak level
, which will help with the average level in the dynamic range. Even though you want to utilize your dynamic range as much as possible, there’s no single rule to live by for your tracks.
Another aspect of the range in dynamics is the spatial location of the sounds in the track. We have two ears, and their position allows us to hear the general or exact location of where a sound is coming from. This also affects music production and a track’s dynamic range. The spatial location of the sounds in the audio will directly affect how the listener perceives the audio. Furthermore, there are many ways to expand and refine the dynamic range of your mix. Working on EQ, compression, and even stereo spread plug-ins can help shape the sound you’re looking for.
If a waveform has been digitized, the correct RMS value may be calculated directly. Most digital and PC-based oscilloscopes include a function to give the RMS value of a waveform. The precision and the bandwidth of the conversion is entirely dependent on the analog to digital conversion. In most cases, true RMS measurements are made on repetitive waveforms, and under such conditions digital oscilloscopes (and a few sophisticated sampling multimeters) are able to achieve very high bandwidths as they sample at much higher sampling frequency than the signal frequency to obtain a stroboscopic effect.
Perceived “loudness” varies approximately logarithmically with acoustical output power. The change in perceived loudness as a function of change in acoustical power is dependent on the reference power level. It is both useful and technically accurate to express perceived loudness in the logarithmic decibel (dB) scale that is independent of the reference power, with a somewhat straight-line relationship between 10 dB changes and doublings of perceived loudness.
While a doubling/halving of perceived loudness corresponds to approximately 10 dB increase/decrease in speaker sensitivity, it also corresponds to approximately 10X multiplication/division of acoustical power. Even a relatively modest 3 dB increase/decrease in sensitivity corresponds to a doubling/halving of acoustical power. When measuring in ‘half space’, the boundary of the ground plane cuts the available space that the sound radiates into in half and doubles the acoustical power at the receiver, for a corresponding 3 dB increase in measured sensitivity, so it is important to know the test conditions. ±3 dB change in measured sensitivity also corresponds to a similar doubling/halving of electrical power required to generate a given perceived loudness, so even deceptively ‘minor’ differences in sensitivity can result in large changes in amplifier power requirement. This is important because power amplifiers become increasingly impractical with increasing amplifier power output.
Many high quality domestic speakers have a sensitivity between ~84 dB and ~94 dB, but professional speakers can have a sensitivity between ~90 dB and ~100 dB. An ’84 dB’ source would require a 400-watt amplifier to produce the same acoustical power (perceived loudness) as a ’90 dB’ source being driven by a 100-watt amplifier, or a ‘100 dB’ source being driven by a 10 watt amplifier. A good measure of the ‘power’ of a system is therefore a plot of maximum loudness before clipping of the amplifier and loudspeaker combined, in dB SPL, at the listening position intended, over the audible frequency spectrum. The human ear is less sensitive to low frequencies, as indicated by Equal-loudness contours, so a well-designed system should be capable of generating relatively higher sound levels below 100 Hz before clipping.
Like perceived loudness, speaker sensitivity also varies with frequency and power. The sensitivity is measured at 1 watt to minimize nonlinear effects such as power compression and harmonic distortion, and averaged over the usable bandwidth. The bandwidth is often specified between the measured ‘+/-3 dB’ cutoff frequencies where the relative loudness becomes attenuated from the peak loudness by at least 6 dB. Some speaker manufacturers use ‘+3 dB/-6 dB’ instead, to take into account the real-world in-room response of a speaker at frequency extremes where the floor/wall/ceiling boundaries may increase the perceived loudness.
Speaker sensitivity is measured and rated on the assumption of a fixed amplifier output voltage because audio amplifiers tend to behave like voltage sources. Sensitivity can be a misleading metric due to differences in speaker impedance between differently designed speakers. A speaker with a higher impedance may have lower measured sensitivity and thus appear to be less efficient than a speaker with a lower impedance even though their efficiencies are actually similar. Speaker efficiency is a metric that only measures the actual percentage of electrical power that the speaker converts to acoustic power and is sometimes a more appropriate metric to use when investigating ways to achieve a given acoustic power from a speaker.
Adding an identical and mutually coupled speaker driver (much less than a wavelength away from each other) and splitting the electrical power equally between the two drivers increases their combined efficiency by a maximum of 3 dB, similar to increasing the size of a single driver until the diaphragm area doubles. Multiple drivers can be more practical to increase efficiency than larger drivers since frequency response is generally proportional to driver size.
System designers take advantage of this efficiency boost by using mutually coupled drivers in a speaker cabinet, and by using mutually coupled speaker cabinets in a venue. Each doubling of total driver area in the array of drivers brings ~3 dB increase in efficiency until the limit where the total distance between any two drivers of the array exceeds ~1/4 wavelength.
Power handling capability is also doubled when the number of drivers doubles, for a maximum realizable increase of ~6 dB in total acoustic output per doubling of mutually coupled drivers when the total amplifier power is also doubled. Mutual coupling efficiency gains become difficult to realize with multiple drivers at higher frequencies because the total size of a single driver including its diaphragm, basket, waveguide or horn may already exceed one wavelength.
Sources that are much smaller than a wavelength behave like point sources that radiate omnidirectionally in free space, whereas sources larger than a wavelength act as their own ‘ground plane’ and beam the sound forward. This beaming tends to make high frequency dispersion problematic in larger venues, so a designer may have to cover the listening area with multiple sources aimed in various directions or placed in various locations.
Sound absorbing structures, sound diffusing structures, and digital signal processing may be employed to compensate for boundary effects within the designated listening area.
From this it is clear that the RMS value is always greater than or equal to the average, in that the RMS includes the “error” / square deviation as well.
До какого уровня RMS следует довести мастерство?
Одним из самых сложных моментов в музыке является то, насколько субъективным может быть ее создание и конечный продукт. Несмотря на это, при мастеринге звука все же существует множество параметров, которые должны соответствовать определенным параметрам. Громкие треки, цель которых – передать смелый и интенсивный звук, должны иметь среднеквадратичный уровень примерно от -7dBFS до -12dBFS. Для треков, не обладающих такой динамической энергией, или более тихих частей лучше подойдет среднеквадратичный уровень от -16dBFS до -18 dBFS.
Пиковые уровни в аудио могут быть сложными для управления, и это может стать еще более сложной задачей, если у вас больше дорожек, конкурирующих за одно и то же звуковое пространство. Кроме того, использование измерителей уровня – отличный способ лучше понять, где в спектре частот находится пик вашего звука. Динамический диапазон вашего производства имеет прямую зависимость от пиковой громкости, и то, как они управляются в вашем треке, требует уникального подхода к конкретным потребностям производства.
Любой трек, который вносит в микс слишком много искажений, должен управляться соответствующим образом с остальным миксом. Правильное значение RMS, которое вы ищете, также зависит от стиля песни и жанра и требует собственного подхода к миксу для достижения желаемого уровня RMS. Некоторые песни требуют более громкого или более тихого подхода, но крайне важно убедиться, что ваши уровни не пиковые, и каждый трек смикширован соответствующим образом.


